3 Unique and Easy Cold-Processed Soap Recipes: Discover Homemade Skincare Magic
Discover 3 simple and natural soap recipes you can easily make at home. Perfect for beginners, these DIY soap tutorials use minimal ingredients for fresh, nourishing skincare.
SKINCARE
Kathrine-Anne Hill
8/26/20248 min read


Affiliate Disclaimer:
Please note that some of the links in this article are affiliate links. This means that if you click on these links and make a purchase, I may receive a small commission at no additional cost to you. This commission helps support the maintenance and growth of this website and allows me to continue providing valuable information and recommendations. Rest assured, I only recommend products and services that I have personally used or thoroughly researched. Your support is greatly appreciated! “As an Amazon Associate I earn from qualifying purchases.”
Introduction to Cold-Processed Soap Making
Cold-processed soap making is an age-old technique that offers a natural and customizable approach to personal skincare. Unlike commercially produced soaps, which often contain synthetic additives and preservatives, cold-processed soap is made from scratch using natural ingredients. The process involves blending oils and lye, which then undergoes a saponification process. This transformation results in a firm, long-lasting bar of soap packed with the nourishing benefits of its original ingredients.
One of the primary advantages of cold-processed soap lies in its gentle cleansing properties. Commercial soaps can strip the skin of its natural oils, leading to dryness and irritation. However, the handcrafted nature of cold-processed soap allows you to incorporate skin-friendly components such as coconut oil, olive oil, shea butter, and essential oils, which hydrate and soothe the skin. This customization ensures that each bar is tailored to specific needs, be it moisturizing, exfoliating, or therapeutic effects.
The allure of cold-processed soap making also comes from its simplicity and creative potential. This process, though time-honored, is accessible even for beginners. With a few basic tools and ingredients, anyone can start crafting their own soap at home. Additionally, the flexibility to experiment with colors, fragrances, and textures provides an artistic outlet, making the activity both fun and rewarding. Whether one is aiming to create intricate designs or simple rustic bars, the process promotes endless creativity.
Moreover, the satisfaction of using a product you've made with your own hands brings an unmatched sense of accomplishment. Cold-processed soap is not only a practical and sustainable alternative to store-bought options but also a unique way to infuse your skincare routine with personal care and creativity. For these reasons, cold-processed soap making has become increasingly popular among DIY enthusiasts, making it an engaging hobby that promises both beauty and well-being.
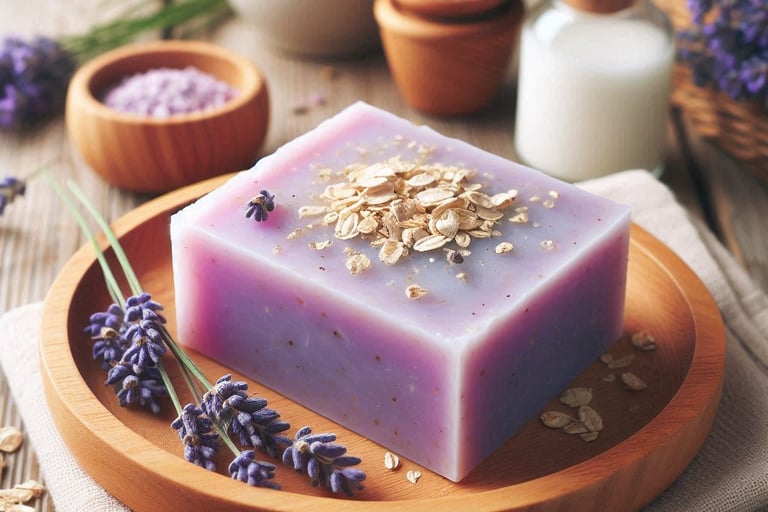
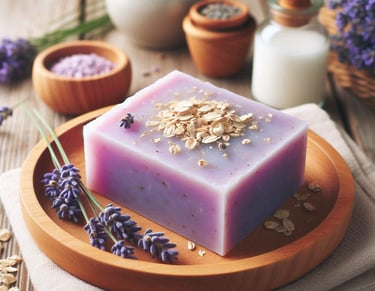
Lavender and Oatmeal Soap Recipe
Creating homemade soap provides an opportunity to personalize skincare products to suit individual needs. Our first recipe focuses on a lavender and oatmeal soap, celebrated for its soothing and exfoliating properties. This recipe utilizes natural ingredients such as lavender essential oil, oatmeal, and a base of olive and coconut oil, making it gentle and nourishing for all skin types. Below are the ingredients and step-by-step instructions to create your own batch of this revitalizing soap.
Ingredients:
280g olive oil
185g coconut oil
40g oatmeal (finely ground)
30g lavender essential oil
74g lye
155g distilled water
Instructions:
Step 1: Prepare the Lye Solution
Wearing appropriate safety gear, slowly add lye to distilled water, stirring gently until fully dissolved. Allow the mixture to cool.
Step 2: Melt the Oils
In a double boiler, melt the olive or coconut oil along with the shea butter until fully liquefied. Let the mixture cool to room temperature.
Step 3: Combine Lye and Oil Mixtures
Once both mixtures are at a similar temperature (around 100°F), gradually mix the lye solution into the melted oils, stirring continuously.
Step 4: Blend and Add Ingredients
Use a stick blender to blend until the mixture reaches ‘trace’ – a thick pudding-like consistency. Add the ground oatmeal and lavender essential oil, stirring until evenly distributed.
Step 5: Mold the Soap
Pour the soap mixture into your prepared mold, smoothing the top with a spatula. Lightly cover the mold with plastic wrap and insulate with towels to retain heat for 24 hours.
Step 6: Curing
After 24 hours, unmold the soap and cut it into bars. Allow the soap to cure in a well-ventilated area for 4-6 weeks to ensure complete saponification and readiness for use.
Lavender and oatmeal soap offers numerous skincare benefits, such as promoting relaxation and providing gentle exfoliation. The lavender essential oil soothes irritated skin while its fragrance has calming effects, making it perfect for a relaxing bath. The oatmeal acts as a mild exfoliant, removing dead skin cells and leaving the skin feeling soft and renewed. By following this recipe, you’ll create a luxurious handmade soap that provides both skincare benefits and a touch of aromatherapy.
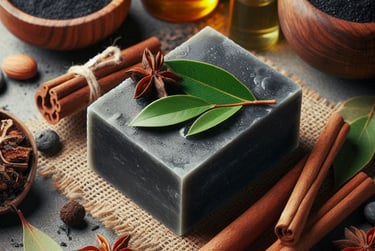
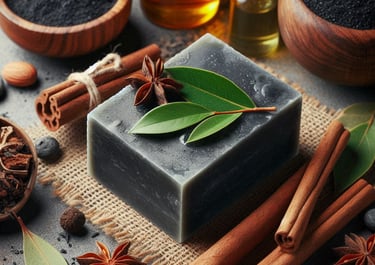
Charcoal and Tea Tree Oil Soap Recipe
The Charcoal and Tea Tree Oil soap recipe stands as a fantastic choice for those with acne-prone and oily skin. Its powerful combination of activated charcoal and tea tree essential oil offers a deep cleansing, antibacterial experience that leaves the skin feeling refreshed and revitalized. To create this soap, you'll need the following ingredients:
Ingredients:
40g of activated charcoal powder
30g of tea tree essential oil
220g of shea butter
220g of coconut oil
75g of olive oil
57g of castor oil
186g of distilled water
80g of lye (sodium hydroxide)
Instructions:
Step 1: Prepare the Lye Solution
Wearing appropriate safety gear, slowly add lye to distilled water, stirring gently until fully dissolved. Allow the mixture to cool.
Step 2: Melt the Oils
Melt the shea butter and coconut oil together in a double boiler. Once melted, add the olive oil and castor oil, mixing thoroughly.
Step 3: Combine Lye and Oil Mixtures
Once both mixtures are at a similar temperature (around 100°F), gradually mix the lye solution into the melted oils, stirring continuously.
Step 4: Blend and Add Ingredients
Use a stick blender to blend until the mixture reaches ‘trace’ – a thick pudding-like consistency. Add the charcoal and tea tree essential oil, stirring until evenly distributed.
Step 5: Mold the Soap
Pour the soap mixture into your prepared mold, smoothing the top with a spatula. Lightly cover the mold with plastic wrap and insulate with towels to retain heat for 24 hours.
Step 6: Curing
After 24 hours, unmold the soap and cut it into bars. Allow the soap to cure in a well-ventilated area for 4-6 weeks to ensure complete saponification and readiness for use.
Crafted with activated charcoal's deep cleansing properties and the antibacterial power of tea tree oil, this soap recipe yields bars that not only cleanse effectively but do so gently, making it an ideal addition to your homemade skincare repertoire.
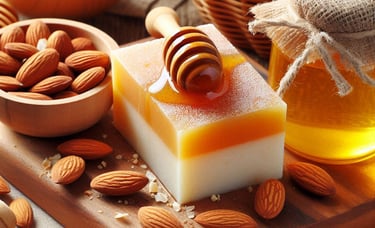
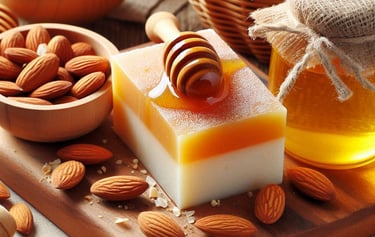
Honey and Almond Milk Soap Recipe
Creating a luxuriant honey and almond milk soap is a gratifying experience, blending the richness of raw honey with the nourishing properties of almond milk. This soap, known for its deeply hydrating and soothing characteristics, is a must-try for homemade skincare enthusiasts.
Ingredients:
380g Coconut oil : Adds moisture and offers antibacterial properties.
380g Olive oil
190g Sweet almond oil
30g Raw Honey
30g Almond Milk
137g Lye (sodium hydroxide)
340g Distilled water
Instructions:
Step 1: Prepare the Lye Solution
Wearing appropriate safety gear, slowly add lye to distilled water, stirring gently until fully dissolved. Allow the mixture to cool.
Step 2: Melt the Oils
Melt the shea butter and coconut oil together in a double boiler. Once melted, add the olive oil and castor oil, mixing thoroughly.
Step 3: Combine Lye and Oil Mixtures
Once both mixtures are at a similar temperature (around 100°F), gradually mix the lye solution into the melted oils, stirring continuously.
Step 4: Blend and Add Ingredients
Use a stick blender to blend until the mixture reaches ‘trace’ – a thick pudding-like consistency. Add the honey and almond milk, stirring until evenly distributed.
Step 5: Mold the Soap
Pour the soap mixture into your prepared mold, smoothing the top with a spatula. Lightly cover the mold with plastic wrap and insulate with towels to retain heat for 24 hours.
Step 6: Curing
After 24 hours, unmold the soap and cut it into bars. Allow the soap to cure in a well-ventilated area for 4-6 weeks to ensure complete saponification and readiness for use.
Using honey and almond milk soap in your daily skincare routine can deeply hydrate and softly cleanse the skin, offering a natural and soothing experience. The combined ingredients ensure a luxurious lather while simultaneously delivering essential nutrients to keep skin healthy and vibrant.
Safety Tips and Best Practices for Cold-Processed Soap Making
When embarking on the journey of cold-processed soap making, prioritizing safety and best practices is paramount. The process involves handling potent chemicals and achieving precise measurements, making adherence to safety protocols essential.
First and foremost, always wear appropriate protective gear. This includes goggles, gloves, and long sleeves to safeguard against accidental splashes of lye or oils. Keeping your skin and eyes protected minimizes the risk of irritation or burns.
Ensuring that you work in a well-ventilated area is equally critical. Lye, when mixed with water, emits fumes that can be harmful if inhaled in concentrated amounts. Proper ventilation dissipates these fumes, creating a safer environment. Open windows or use fans to maintain good air circulation.
Handling lye with caution is another cornerstone of safe soap making. Always add lye to water, not the other way around, to prevent dangerous reactions. Stir the mixture gently to avoid splattering. Use non-reactive containers made from stainless steel or heat-resistant plastic to withstand the heat generated by the lye solution.
Accurate measurement of ingredients is vital for the quality and safety of your soap. Utilize a digital scale for precise measurements, ensuring the balance of oils and lye is maintained. Accurate ratios are crucial for the saponification process, where oils are transformed into soap. Base recipes specify ingredient quantities, and deviations can impact the final product's quality and safety.
Finally, be prepared to troubleshoot common issues. If your soap seizes or becomes too thick too quickly, it might be due to overmixing or incorrect temperatures. Allow the lye solution and oils to cool to the recommended temperatures before combining. If your soap does not trace (thicken) even after prolonged mixing, check your measurements and ensure all ingredients are fresh and not expired.
By adhering to these safety tips and best practices, you can confidently create cold-processed soap, ensuring both your safety and the quality of your homemade skincare products.
Conclusion and Additional Resources
In summary, DIY cold-processed soap making offers a unique and creative outlet for crafting personalized skincare products tailored to your specific needs. The three recipes featured in this blog serve as an excellent starting point for beginners, showcasing the versatility and simplicity of the cold-process method. Beyond the basic ingredients, you have the flexibility to experiment with various essential oils, natural colorants, and additives to create soaps that truly reflect your preferences and skin type.
The benefits of homemade soap are numerous. It ensures the use of natural ingredients, allows for customization, and often results in a more skin-friendly product compared to many commercial options. By embracing this craft, you are not only enhancing your skincare routine but also contributing to a more sustainable and mindful approach to personal care.
We encourage you to delve deeper into the world of cold-processed soap making. For those eager to expand their knowledge and skills, consider exploring some of the following resources:
1. Soap Crafting by Anne-Marie Faiola – This book provides detailed instructions, recipes, and inspiration for soap makers of all levels.
2. Soap Queen Blog – A rich online resource featuring tutorials, videos, and a community of soap enthusiasts.
3. Reddit Soap Making Community – An active forum where hobbyists share tips, experiences, and troubleshoot common issues.
We also invite you to join the conversation in the comments section below. Share your soap-making experiences, creative recipes, and any tips you’ve discovered along the way. Engaging with fellow soap makers can provide valuable insights, encouragement, and inspiration for your soap-making journey. Happy crafting!